Packaging shapes the very first moment when customers touch a product box. The global packaging market climbed to $980 billion in 2023, and premium boxes grew by 8 percent. Many sellers saw sales rise by up to 12 percent after they switched to premium Custom Rigid Boxes that look and feel solid. This guide walks through each step to craft sturdy packs that protect items and delight buyers. It uses simple words, active sentences, and clear cues to keep ideas moving smoothly.
Along with tough walls and crisp finishes, these boxes support hidden magnets, ribbon pulls, and fancy art. Each choice matters for cost, style, and brand image. Readers will learn how to pick materials, nail down sizes, run tests, and add green touches. By the end, every box design will feel doable. Let’s dive into the world of premium box builds.
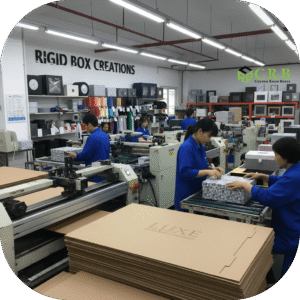
Why Strong Packaging Matters
A firm box speaks of quality before a customer even peeks inside. Boxes made with thick boards resist crushing in warehouses and delivery trucks. Shoppers sense that toughness and link it to product value. Retailers favor such packs for high-end gadgets and gifts.
A rigid box also offers a clean surface for bold colors and shiny foils. Art pops on a flat, strong panel instead of a flimsy fold. Beyond looks, strong packaging cuts down on returns caused by damage. Each undented corner saves on repair costs and boosts customer trust.
Together, these benefits explain why many brands invest more in robust boxes. A sturdy wrapper lays the groundwork for a premium unboxing moment.
The Box Basics: What Makes a Rigid Box
A rigid box stands apart by its core material. Designers glue decorative paper or fabric around a thick greyboard shell. That core often measures 2–4 mm in thickness, strong enough to hold shape under gentle force. On top of that, the wrap brings color, texture, or sheen.
Features like hidden magnets and ribbon pulls add flair without hurting durability. Such elements fit snugly into pre-cut slots in the board. Holes and windows also integrate smoothly without bending edges. All pieces snap together in a solid, non-folding structure.
Understanding these parts makes it easier to plan each layer. From sturdy inner board to sparkling exterior, every detail works as one system.
Guide to Design Premium Custom Rigid Boxes
Here are the top 11 ways to design your Custom Perfume Rigid boxes.
1. Set Clear Goals and Know the Audience
Defining goals keeps design work on point. Designers must decide who opens the box and what feeling that person seeks. A playful style suits kids’ toys, while sleek lines suit luxury watches. Environment matters too—gift buyers want surprise, while retail shoppers need quick grabs.
Key questions include:
- Who will hold this box and why?
- Which emotions should the art trigger?
- Will people reuse the pack for keepsakes?
Alongside these points, list must-have functions like easy re-close, windows for peeks, or eco-friendly stock. Short goal lists keep teams focused on real needs.
With that roadmap, design ideas stay in line with true buyer desires.
2. Material Choices That Fit Style and Budget
Material picks affect cost, style, and feel. Common layers include:
- Greyboard core for a firm base
- Art paper wrap for vivid printing
- Kraft paper wrap for a natural look
- Textured paper for linen or canvas vibes
- Fabric wrap, such as velvet or silk, for ultra-luxe feel
Eco boards made from recycled fibers or bamboo also hit the mark for green shoppers. Those cores lower waste and carry credible eco labels. Meanwhile, water-based or soy inks add greener flair without extra cost.
Pricing shifts with each choice. Designers must balance style goals against budget limits. Comparison charts help teams make smarter calls.
3. Box Styles and Exact Measurements
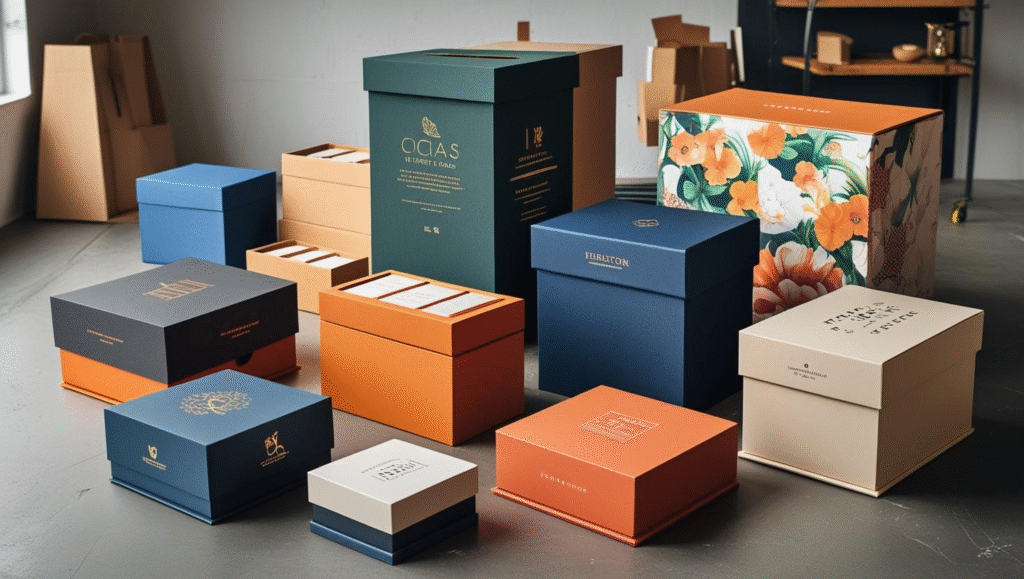
Choosing the right box style stops wasted effort. Popular types include:
- Set-up box: Base and lid lift off with crisp edges
- Telescoping box: Top slides over base for firm fit
- Book-style box: Opens on a side hinge for drama
- Drawer-style box: Inner tray pulls out like a drawer
Accurate measuring keeps items snug without extra wiggle room. Key specs cover:
- Inner height, width, and depth with foam or padding
- Board thickness of 2–4 mm for premium feel
- Lid overhang of 5–10 mm for easy grip
- Slot positions for hinges, magnets, or ribbons
Detailed dielines guide die cutting and gluing. A precise template avoids mismatched cuts and waste.
4. Design Visuals That Catch the Eye
Art drives first impressions across shelves or online previews. High-res images at 300 dpi avoid blurry prints. A limited palette of two to three main colors keeps designs simple and strong. Logos go where eyes land first, without crowding nearby text. Subtle background patterns add depth behind the main art.
Pleasing to the eye visual order matters. Product name stands out on top, followed by taglines or key features. Finally, small legal icons sit at the bottom. That flow guides readers naturally down the panel.
Simple icons and clean fonts help shoppers find info fast. An easy to understand design reduces confusion and boosts sales appeal.
5. Apply Special Finishes for Impact
Surface treatments turn a plain box into an object of desire. Options include:
- Matte lamination for a soft, glare-free look
- Gloss UV coating to make colors gleam under light
- Soft-touch varnish for a velvet-like feel under fingertips
- Spot UV to pick out shiny areas on text or logos
- Foil stamping in gold, silver, or custom shades for metallic glint
Each finish choice for Drawer custom rigid boxes works as both look and shield. Coatings protect printed art from scratches. Matching a finish to the box style and target audience lifts perceived value.
A careful mix of textural cues and shine helps a box feel richer than rival packs.
6. Build Prototypes and Run Tests
Skipping prototyping invites costly surprises. Teams must build at least one sample box before full runs. Key checks include:
- Fit trial: Slide item in and out to confirm snugness
- Pressure check: Press sides to mimic stacking loads
- Drop replay: Drop from a few inches to spot weak points
- Hinge run: Open and close the box dozens of times to test wear
Each trial uncovers flaws in dielines or material layers. Adjusting templates now saves time and money later. Sample tests also help confirm which finish holds up best under real handling.
7. Smooth Production Planning and Checks
Clear files and tight schedules keep production on track. Share these essentials with your printer:
- High-res PDF files with proper trim, bleed, and color marks
- CMYK profiles or exact Pantone spot definitions for spot-on hues
- Dieline guides showing cut, fold, and glue lines in detail
- Material codes for each core, wrap, and finish layer
- A production and shipping timeline with check-in dates
Open lines of communication prevent errors. Quick feedback on printed proofs lets teams fix art misalignments or color shifts at the start. That close collaboration ensures each pack matches the design brief.
8. Raise the Unboxing Factor
Small surprises inside a box spark real joy. Ideas for added fun include:
- Branded tissue paper that gently wraps the product
- Personalized cards on heavy stock paper
- Sample gifts or discount coupons in hidden pockets
- QR codes linking to short how-to videos or playlists
That extra touch feels like a reward. Customers often photograph these moments for social feeds. A viral unboxing clip brings free buzz far beyond any ad budget.
9. Green Practices for Modern Packaging
Eco-friendly choices win over today’s shoppers. Simple steps include:
- Use recycled or FSC-certified core boards
- Choose water-based inks that cut volatile fumes
- Select compostable wraps and labels for easy disposal
- Reduce extra layers to shrink weight and waste
Eco claims boost trust and repeat purchases. Buyers often seek out green symbols on shelves. A sustainability story on the pack adds real value to any box.
10. Common Design Pitfalls to Avoid
Some design mistakes lead to big headaches. Watch out for:
- Off-center art shifts that ruin symmetry at folds
- Tiny text that fades into the background when wrapped
- Overloaded finishes that peel or clash under light
- Dielines with wrong bleed margins that trim off parts
- Lack of strength tests for heavy or odd-shaped items
A simple peer review process catches most missteps before any tooling cost appears. That habit saves both time and budget.
11. Secure Packing and Shipping Tips
Taking extra steps for shipping keeps boxes pristine on arrival. Actions to consider:
- Insert foam or molded pulp trays for fragile items
- Slip boxes into crush-proof sleeves or mailers
- Add handling labels and orientation arrows on cartons
- Run a trial shipment through your courier route
These tactics protect Custom printed Rigid Boxes with logos from bumps and drops. Happy recipients get flawless packages every time.

Conclusion
Designing printed custom Rigid Boxes wholesale requires clear vision, smart planning, and careful testing across every stage. From solid cores and bold art to luxe finishes and green choices, each step adds real value. Accurate dielines, prototyping, and open production talks prevent costly mistakes. Small unboxing surprises spark joy and free word-of-mouth buzz. With these tips, creating strong, memorable boxes feels within reach. Quality packaging not only shields products but also builds lasting connections with every customer.
FAQs
How do I measure a rigid box?
To measure:
- Measure product height, width, and depth in inches
- Add 0.25″–0.5″ extra for padding or inserts
- Confirm dimensions fit your desired box style
What is the best board thickness for rigid boxes? Choose:
- 1.2 mm for light items like jewelry
- 1.8 mm for medium-weight goods like candles
- 3 mm for heavy products like glassware
Why do brands prefer them over folding cartons?
Rigid packaging boxes provide:
- Up to 50% more crush resistance
- A premium unboxing experience
- Reusability that cuts waste
What finishing looks best on them?
Popular finishes include:
- Soft-touch matte for a velvet feel
- Spot UV to highlight logos
- Foil stamping in gold or silver
How do I add a magnetic closure to a box?
To add magnets:
- Choose thin neodymium strips
- Place magnets in lid and base layers
- Seal magnets under paper wrap for a clean finish